Summary
Temperature sensor integrations let PSTrax pull cooler and refrigerator temperatures straight from your sensor provider. Readings sync automatically on a regular schedule, are checked against the temperature range you set, and are added to the temperature history of every blood unit in that container — so the cold-chain record your blood bank asks for builds itself. PSTrax works with three providers: Delta BloodCOMM®, Temp Stick, and SensorPush. You can run more than one at a time, for example a Delta cooler with a Temp Stick as a backup.
Instructions
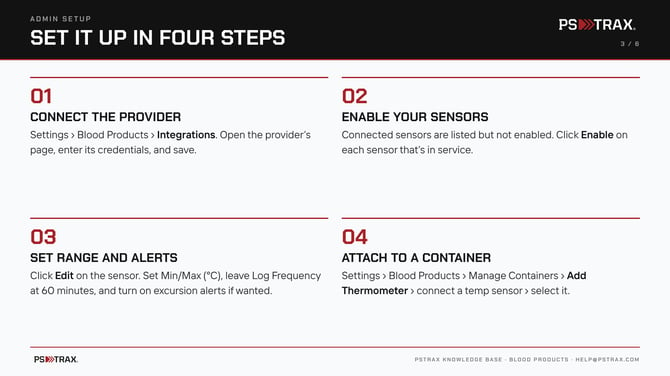
Setup has four parts: connect your provider, enable the sensors you use, set each sensor’s temperature range and alerts, then attach each sensor to the blood products container it monitors. You’ll need Blood Products admin access and the login details for your sensor provider account.
Note: If you don’t see Manage Integrations under Settings > Blood Products, contact us at help@pstrax.com and we’ll turn on sensor integrations for your department.
Step-by-Step Instructions
Connect Your Provider
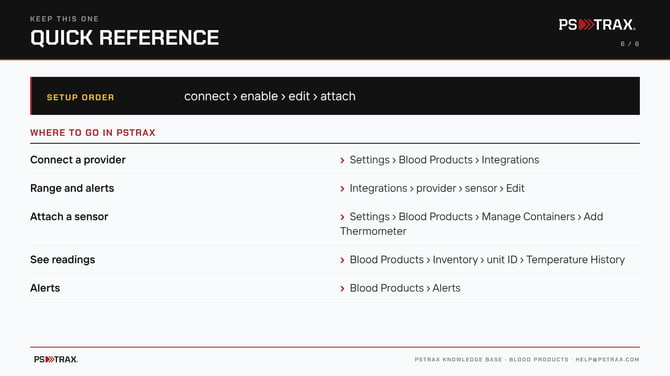
- Go to Settings > Blood Products > Manage Integrations.
- Open the page for your provider: Delta BloodCOMM®, Temp Stick, or SensorPush. Each page has its own Quick Start guide.
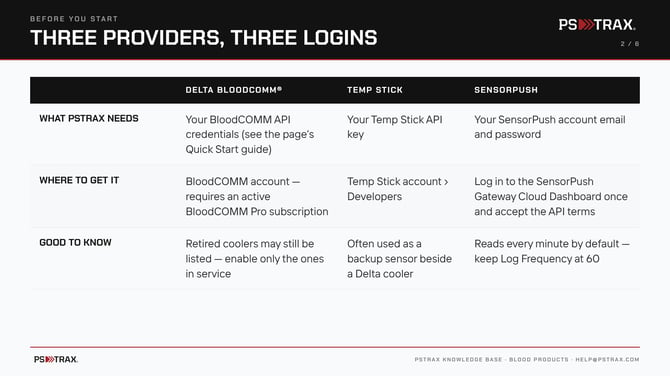
- Enter the credentials the page asks for:
- Delta BloodCOMM® — your BloodCOMM API credentials. Requires an active BloodCOMM Pro subscription with a license on each connected device.
- Temp Stick — the API key from the Developers section of your Temp Stick account.
- SensorPush — your SensorPush account email and password.
- Click Save. Where a Test Connection button is shown, use it to confirm the credentials work.
Note: Before connecting SensorPush, log in to the SensorPush Gateway Cloud Dashboard once and accept the API terms of service. This turns on API access for your account.
Enable Your Sensors
- Once connected, your provider’s sensors are listed on its Integrations page but are not enabled.
- Click Enable on each sensor that is in service. Only enabled sensors can be attached to a container.
Note: Delta may list coolers that have been retired but are still in your BloodCOMM account. Enable only the coolers you use.
Set the Temperature Range and Alerts
- Click Edit on an enabled sensor.
- Review the Sensor Name and Reading Frequency. These come from your provider and can only be changed in the provider’s own system.
- Leave Log Frequency at 60 minutes. PSTrax still stores every reading taken in between.
- Set the Min and Max temperature in °C. Most programs use 2–6 °C; some use 2–8 °C.
- (Optional) Turn on excursion alerts to raise an alert when readings fall outside the range. You can require a number of out-of-range readings in a row before an alert is raised, so one stray reading doesn’t trigger a burst of alerts.
- Click Save.
Note: If you also set alarms in your provider’s own software, you may receive alerts from both systems. Choose where you want alerts to come from.
Attach the Sensor to a Container
- Go to Settings > Blood Products > Manage Containers.
- Find the container and click Add Thermometer.
- Choose to connect a temp sensor instead of adding a manual thermometer.
- Select the sensor and attach it.
Note: A sensor can be attached to one container at a time. A container can hold several sensors and manual thermometers together. To change a sensor’s temperature range, go back to the sensor’s Edit page — it can’t be changed from the container.
View Sensor Readings
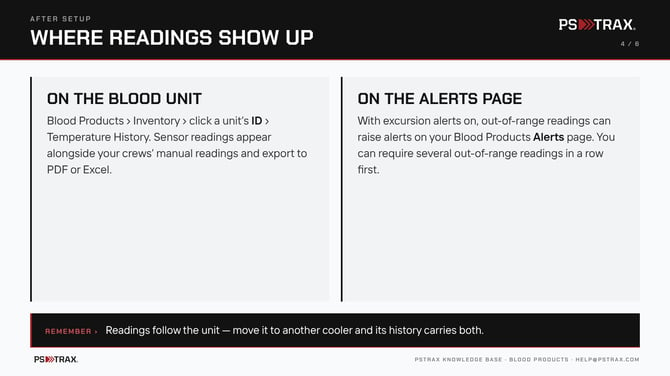
- Go to Blood Products > Inventory.
- Click a blood unit’s ID to open its details and event history.
- Open the Temperature History. Sensor readings appear alongside the manual readings your crews enter.
- Export the history to PDF or Excel to share with your blood bank.
Note: Readings are recorded on the blood unit, not the cooler. If a unit moves from one cooler to another, its temperature history includes readings from both
Good to Know
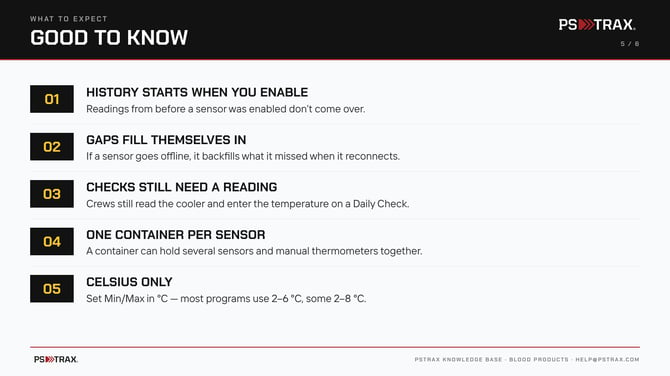
- History starts when a sensor is enabled. Readings from before that date don’t come over.
- Gaps fill themselves in. If a sensor goes offline, PSTrax backfills the readings it missed when it reconnects.
- Daily Checks still need a reading. A connected sensor shows on the check, but crews still read the cooler and enter the temperature.
- Alerts appear on the Blood Products Alerts page. Use Settings > Blood Products > Alert Recipients to choose who is notified for each container.