Add, edit, and remove users in PSTrax
In this article
NOTE: Only users with Manage Personnel permissions enabled can add, edit, and remove users in PSTrax. We recommend limiting the number of personnel with this permission level.
Adding users
To add a new user in PSTrax, go to Settings > Personnel > Add a User.- Name (required)
- Login / User Name (required) - This must be unique across all of PSTrax. We recommend using the users' email address.
- Password (required)
- Email Address (required) - This is the email that PSTrax alert notifications will be sent to.
- Cell Phone & Carrier - Required to receive alert notifications via text message.
- Badge / ID Number
- Shift - If no shifts display in the dropdown, please contact help@pstrax.com to set up.
- Home Station - Set the user's default home station to log directly into the station they work out of most. If they work at multiple locations, set to No Home Station to display a station selection page each time they log in.
- Log-In Landing Page - Set the preferred log-in home page to one of the three options:
- Station Home - displays the apparatus schedule, alerts, and journal entries. This is the default option for all users.
- Department Status Report (Mobile) - displays all vehicles across all stations in a mobile-optimized format. You can view the Department Status Report by navigating to Vehicle & Station > Department Status Report.
- Department Status Report (Table) - displays all vehicles across all stations in a format optimized for a desktop, including search and filter options. You can view the Department Status Report by navigating to Vehicle & Station > Department Status Report > Table View.
- Station Access Settings - Select which station(s) this user should have access to.
- Module-Specific Settings - Each module your agency is signed up for has specific settings that can be enabled or disabled for each user.
- Additional Permissions - Set permissions for the journal and personnel settings:
- Manage Journal - allows the user to create Journal categories, add posts in admin-only Journal categories, and edit / archive posts for all users.
- Manage Personnel - allows the user to add, edit, and deactivate users in PSTrax.
- Emergency Contact Information - Input primary and secondary emergency contact information. Users can complete this for themselves in their User Settings (Settings > User Settings). Only users with Manage Personnel permissions will be able to see this information for other users.
Editing users
To edit an existing user in PSTrax, go to Settings > Personnel > User List and click Edit User next to the person you'd like to change. For a detailed list of user permission levels, check out this article.
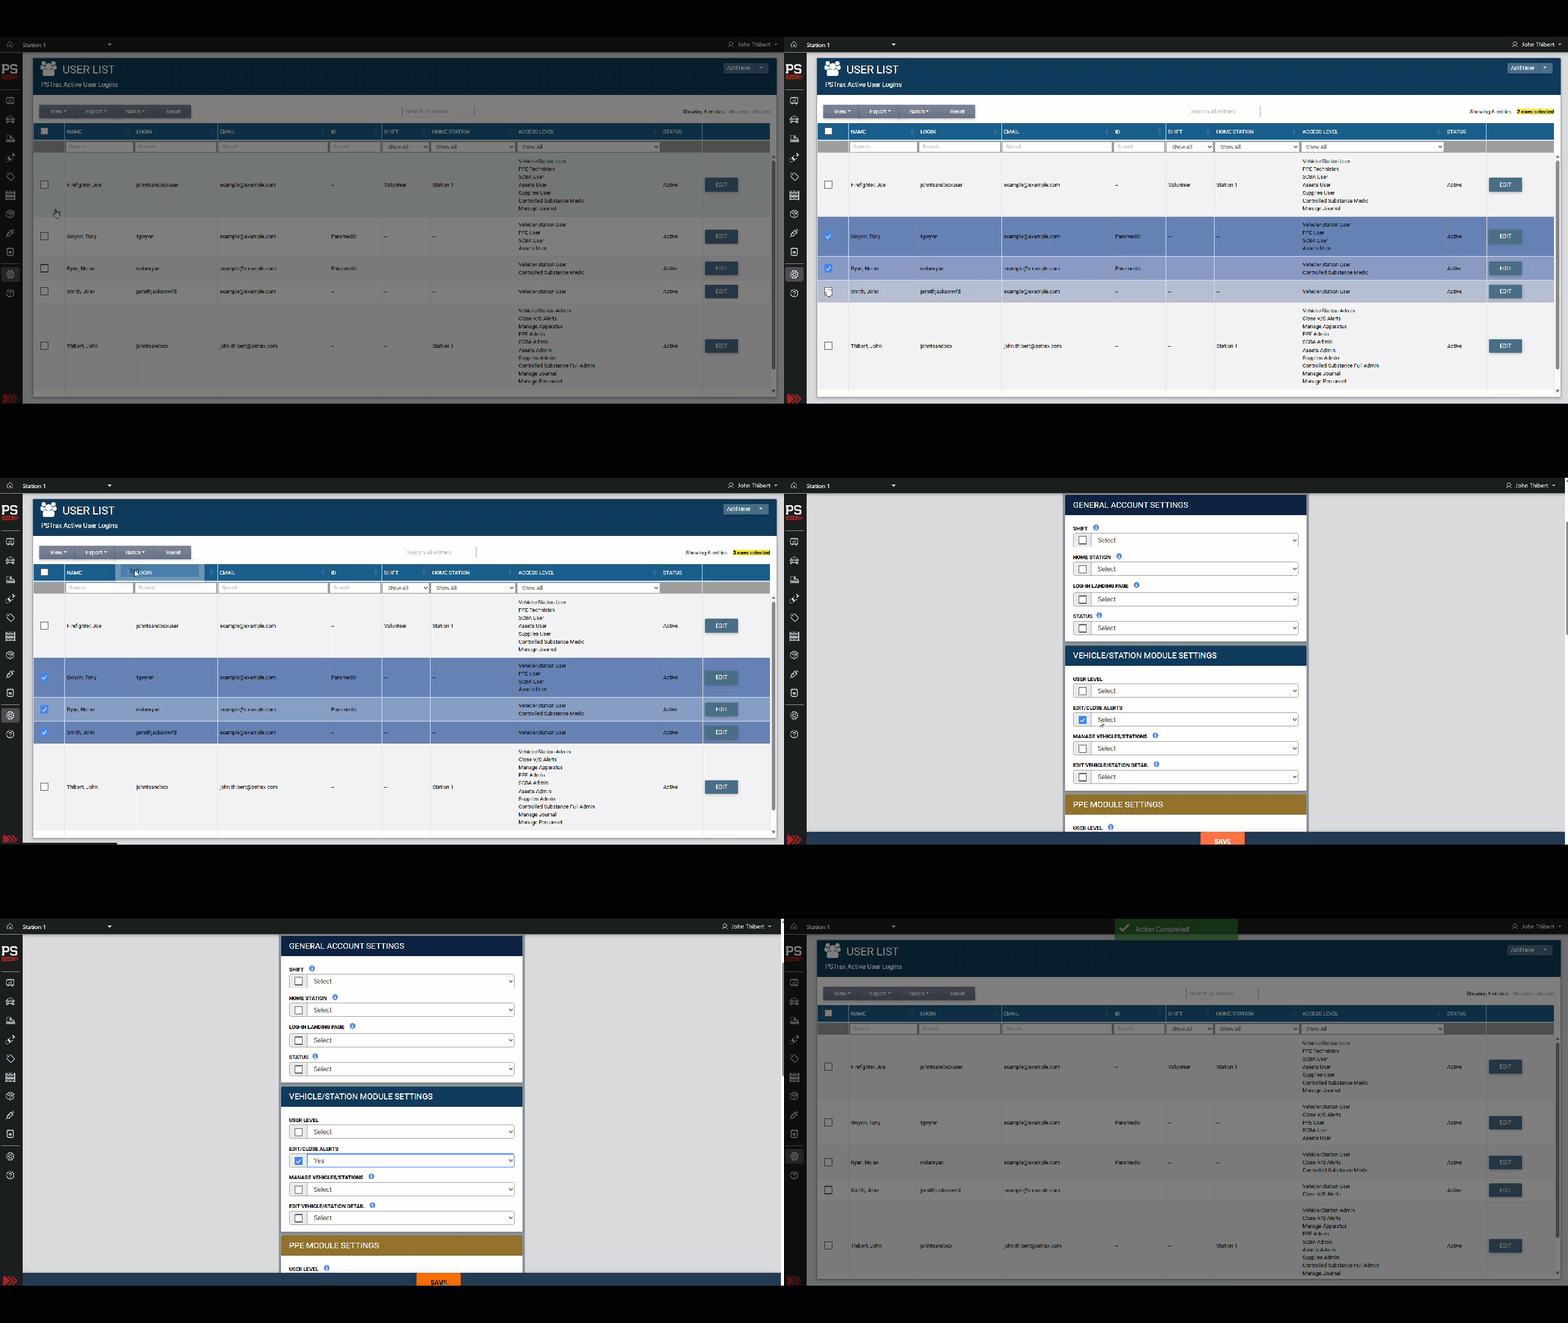
If you need to change the information for multiple users at one time, select the users you want to edit from the User List and click Batch > Edit. Make sure you click the checkbox next to the fields you want to change.

Removing users
When a user no longer needs access to the system, he/she can be deactivated by navigating to Settings > Personnel > User List > Edit User and selecting Inactive under the Status section. This will shut off the login for the user, but keep their name tied to any past logged activity in PSTrax. You can view all inactive users at Settings > Personnel > User List > Inactive Users (in the dropdown next to Add User in the upper right corner).
NOTE: When you deactivate a user with PPE assigned to them, the system will automatically move their gear to Unassigned. If you do not wish for this to happen, make sure you reassign or retire their gear in PPE > Gear List before making them inactive.
Adding and Updating Positions
Summary
This article describes how to add and manage personnel positions within PSTrax. For users with the appropriate permissions, this feature allows for the creation of different ranks or roles (e.g., Paramedic, Firefighter, Captain). Once created, these positions can be assigned to individual users or to multiple users at once, helping to better organize your personnel roster.
Instructions
First, you will navigate to the personnel settings to create a list of all the positions or ranks used in your organization. After setting up the positions, you can then assign them to staff. You can do this by editing a single user's profile to add their specific position, or you can use the batch edit tool to assign the same position to a group of selected users simultaneously.
Step-by-Step Instructions
Settings → Personnel → Positions
-
Navigate to Settings → Personnel → Positions to manage the available roles.
-
Click Add Position to create a new role, such as Paramedic or EMT.
-
You can add as many positions as needed.
-
To change the order of the list, click and drag a position to reorganize it.
-
You may also edit or delete existing positions from this screen.
Assign a Position to an Individual User
-
Navigate to the Personnel list.
-
Select a user and click Edit.
-
In the Position field, search for and select the desired position.
-
Click Save. The assigned position will now appear in the "Position" column on the personnel list.
Assign a Position to Multiple Users
-
Navigate to the Personnel list.
-
Select the checkboxes next to the names of all users you want to assign to the same position.
-
Click the Batch Edit button.
-
Select Position from the dropdown menu.
-
Choose the specific position you want to assign to the selected users.
-
Click Save.
